

Background
One of the domains to explore by the R&D team is DevSecOps (Development, Security, Operations). When I joined the team, the basic CI/CD pipeline with integration to security tools has been deployed in the internal lab. I was tasked to create a scenario as a showcase using a vulnerable application utilizing deployed CI/CD.
This article will discuss about one of the use cases created in the lab. It is showing the integration of Jenkins + Gitlab + SonarQube executing DevSecOps for a Vulnerable Java Repository.
Setup
- Windows 10 Jenkins Node, installed with JDK 11 and Git
- Gitlab server
- SonarQube installed with Dependency Check add-ons
- Jenkins installed with gitlab plugin, sonarqube scanner plugin, and sonar quality gates plugin
- Create a project and push the vulnerable java code to Gitlab
All of the above components has been available in the RnD Lab network.
Flow Overview
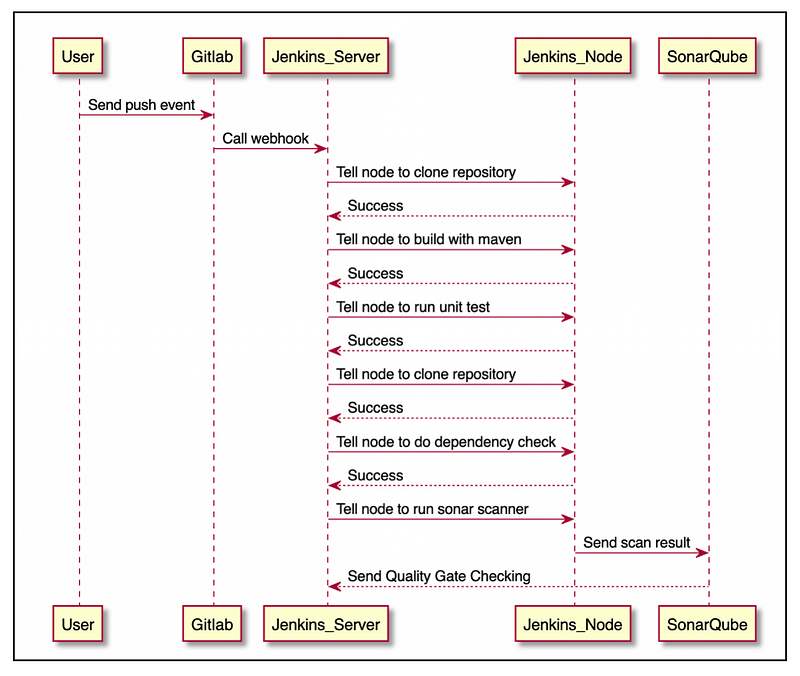
The diagram below depicted the flow of the DevSecOps pipeline used in this example
Gitlab Configuration
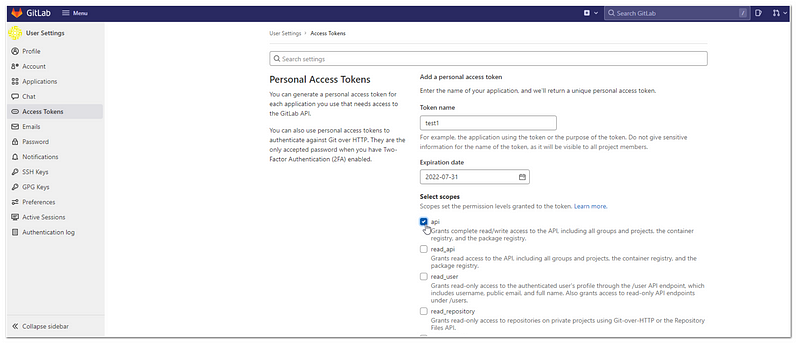
Create Access Token to be used by Jenkins:
- User> Preferences >Access Tokens
- Input data into “Token Name”, “Expiration Date”. Select API as the scope, then click “Create personal access token”
- Copy the token into notepad for further use (we will use it later in Jenkins configuration)
Sonarqube Configuration
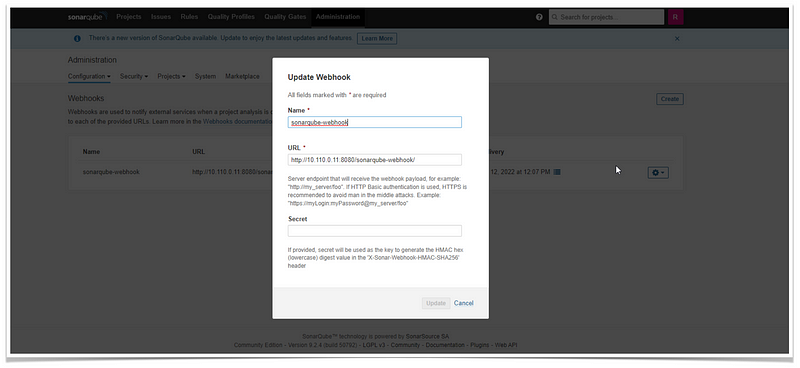
Create a webhook that sonarqube will send data to (Jenkins):
- Administration > Configuration (click the down arrow) > Webhook
- Input the name (example:webhook01), and URL (example: http://<jenkins_ip_address>:<jenkins port>/sonarqube-webhook)
- Click Create
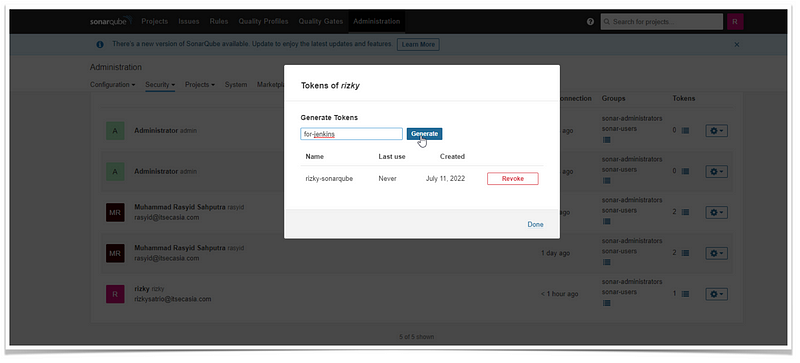
Create Token to be used by Jenkins:
- Administration > security> users
- Click the button under Tokens,
- In Generate Tokens, input the token name, and click generate
- Copy the resulting token into notepad or somewhere else (we will use it later in Jenkins configuration)
Jenkins Configuration
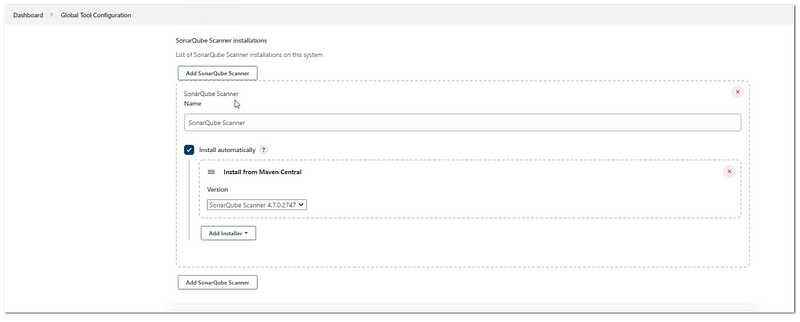
First, we need to configure SonarQube Installation:
- Manage Jenkins> Global Tool Configuration
- Under sonarqube scanner, click “Add SonarQube Scanner” and then choose to install automatically, and choose Install from Maven Central Version.
- Click save
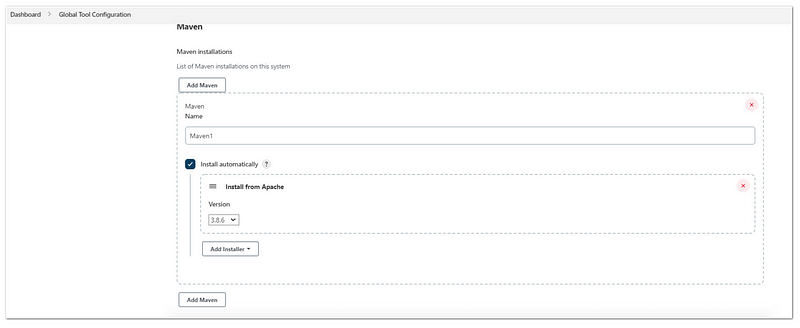
After that, we need to configure Maven Installation:
- Manage Jenkins> Global Tool Configuration
- Under Maven, click “Maven Installation” and then choose to add Maven
- Input the name (example:maven1), choose “install automatically” and choose Install from Apache version 3.8.6
- Click save
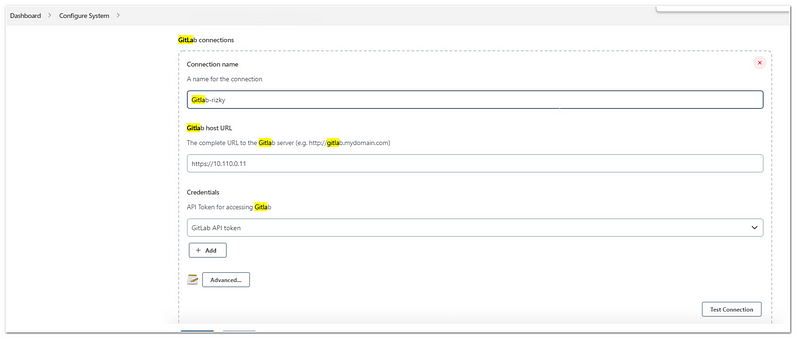
After that, we need to configure the connection to GitLab:
- Manage Jenkins> Configure System
- Find the Gitlab tag, and click add
- Fill out the connection name(example:gitlab1), then the GitLab's URL, and then add new credentials
- In the new credentials window, choose Kind: “Gitlab API Token”, and then input the Token from the “Gitlab configuration” steps. Input the ID and description also, and then click Add
- Click the Test Connection, if it succeeds, then click Save
After that, we need to configure the connection to sonarqube:
- Manage Jenkins> Configure System
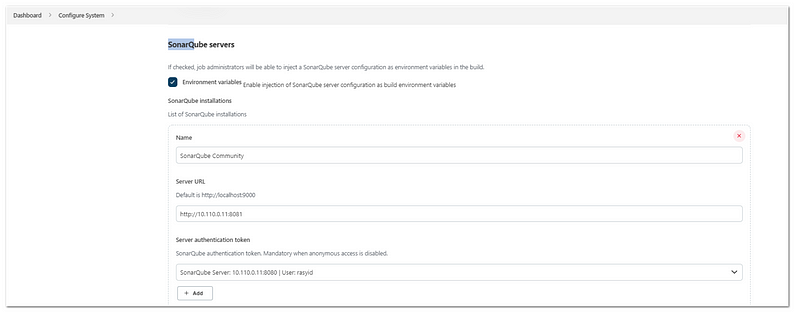
- Find the “SonarQube servers” tag,
- Fill out the name(example:sonar1, this name will be used in Jenkinsfile config), and URL for the sonarqube. Then add the credentials for the “Server Authentication Token”
- In the new credentials window, choose Kind: “Secret Text”, and then input the Token from the “Sonarqube configuration” steps into “Secret”. Input the ID and description also, and then click Add
- Click Save
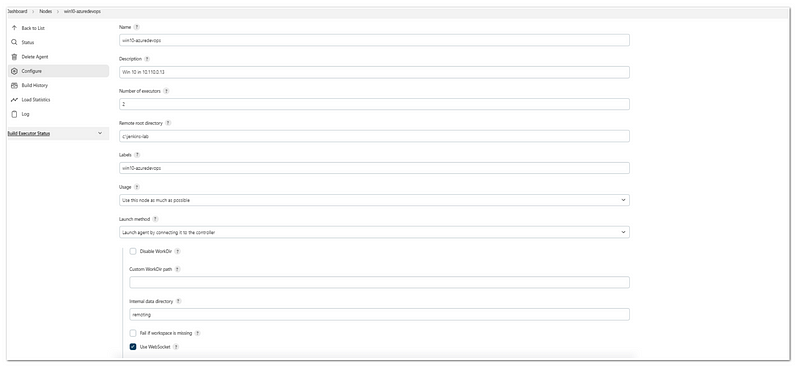
After that, we need to add our Jenkins node (the windows 10 VM):
- Manage Jenkins> Manage Nodes and Clouds> New Nodes
- Input the Node Name(example: win 10), and choose a permanent agent
- In the remote root directory, fill out the remote root for Jenkins (example: c:\jenkins-lab)
- In the launch method, choose “Launch agent by connecting it to the controller”, and choose the “Use Websocket”
- Click save
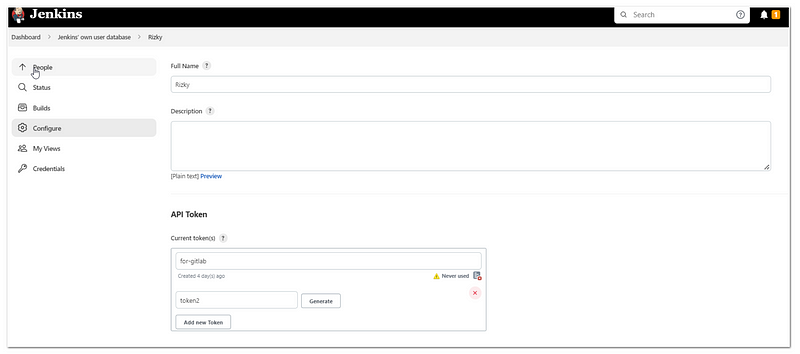
After that, we need to create a token to be used by GitLab to call Jenkins:
- Manage Jenkins> Manage Users>
- Click the wheel button in the user
- Then in the API Token, click “Add new Token”, input a name and click generate
- Copy the resulting token into notepad or somewhere else ( we will use it later in Gitlab’s repository configuration)
Pipeline Configuration
Pipeline configuration is done in Jenkins. Here are the steps:
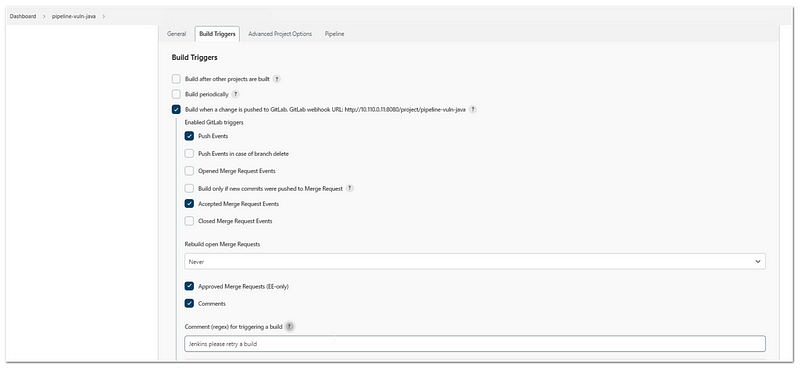
- New item> pipeline
- In the build trigger, choose “Build when a change is pushed to gitlab”. Copy the URL beside it
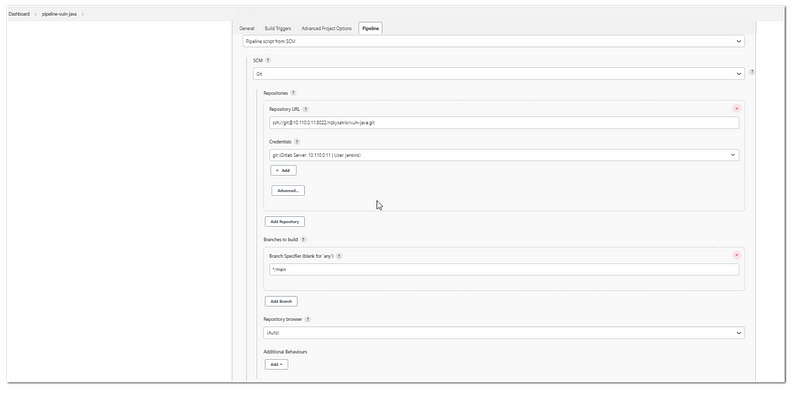
- In the pipeline header, choose “Pipeline script from SCM” and “Git” as the SCM. Input the repository url, and create the credentials (username with password, use the gitlab username and password that can connect to the repository)
- In the “Branch specifier” choose the branch to be build (usually */main)
- In the “Script Path” input “Jenkinsfile”
- Then click save
Then we go to gitlab to set up the webhook flow:
- Open the repository to be integrated in gitlab
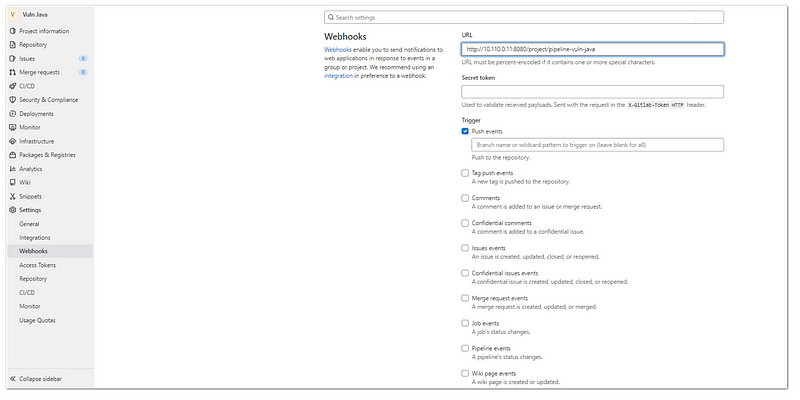
- Settings> Webhooks
- Input the url (http://<Jenkins_username>:<Jenkins_Access_Token>/project/<pipeline_name>). Choose “push events” as the trigger, disable the SSL Verification, and click Add webhook. The url is the same from steps no. 2 in Jenkins Pipeline configuration
- Test the webhook
5. Add Jenkinsfile to the webhook. Below is the Jenkinsfile to use:
Notes
From this example, we can add many more things to the pipeline, such as adding docker command so the code will be instantly deployed on the Jenkins node. Do not forget to install docker in the Jenkins’s node and also write Dockerfile in the repository. Happy exploring!!